Queue
14 minutes, 37 seconds
-465 Views 0 Comments 0 Likes 0 Reviews
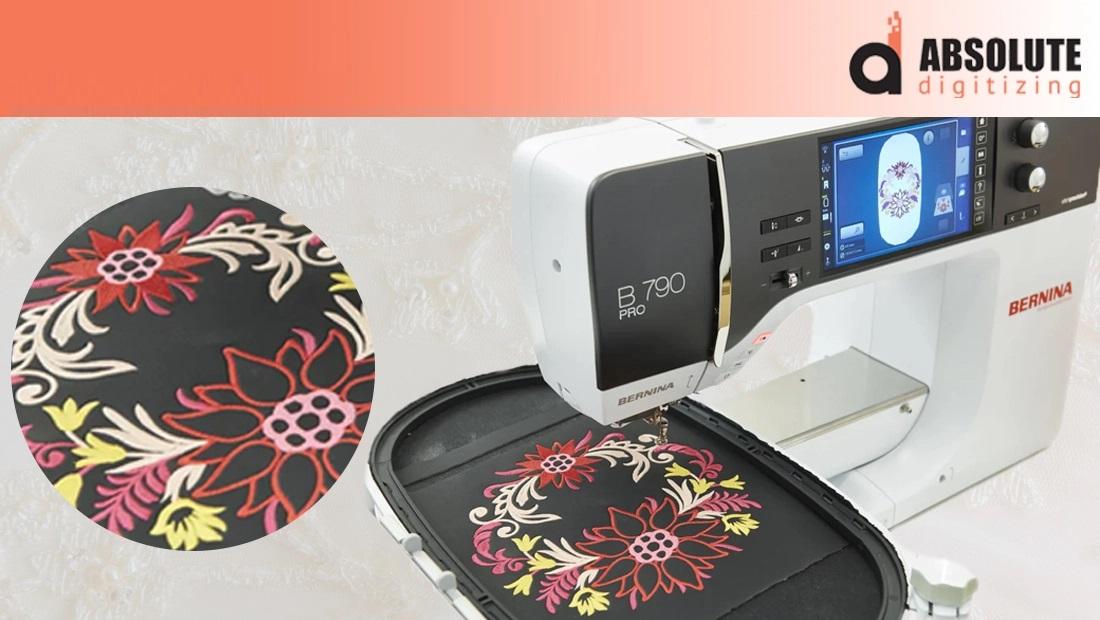
You have a beautiful logo or artwork ready to embroider, but there is one problem: your Bernina machine cannot simply stitch a regular image file. Before the needle can bring your artwork to life, the design needs to be converted into instructions the machine can understand.
Learning to create embroidery files for Bernina machines is easier when you understand the basic process. You need the right file format, suitable digitizing settings, correct design size, and a little attention to how stitches behave on fabric.
Whether you are creating a personal monogram, business logo, patch, or decorative pattern, the right preparation can make a big difference in the final embroidery.
Bernina embroidery machines commonly use the EXP embroidery format for machine embroidery designs. Depending on the specific model and workflow, other related file types may also be involved.
It is important to check your machine's manual before exporting a design because file requirements can vary between models.
The key information an embroidery file needs to communicate includes:
Stitch placement
Stitch direction
Stitch type
Stitch length
Stitch density
Thread color sequence
Needle movements
Design size
Trim and jump information
A regular JPG or PNG contains visual information, while an embroidery file contains stitching instructions.
The process starts with artwork and ends with a machine-ready embroidery file.
Here is the basic workflow.
Start with a clean image of the design you want to embroider.
Vector artwork is often helpful because it provides clear shapes and edges. However, you can also work with raster images if they are high quality enough for digitizing.
Before starting, remove unnecessary details and make sure the artwork has clear shapes.
Determine how large the design should be when embroidered.
For example, a small logo for a shirt may need completely different digitizing from a large decorative design intended for a jacket.
Design size affects:
Stitch density
Detail visibility
Lettering
Stitch length
Overall stitch count
A design that looks excellent at 6 inches may become difficult to read when reduced to 2 inches.
This is the most important part of the process.
Digitizing software converts your artwork into individual embroidery objects. Each object is assigned suitable stitch settings.
You may need to choose between:
Satin stitches
Running stitches
Fill stitches
Underlay stitches
Decorative stitch patterns
The goal is not simply to trace the artwork. The goal is to create a stitch plan that will work well on fabric.
Stitch direction can change the appearance of an embroidered design.
For example, lettering may need different stitch directions from a curved leaf or filled background.
Good stitch direction can improve texture, dimension, and visual consistency.
Density determines how closely stitches are packed together.
Too much density can cause:
Heavy embroidery
Thread buildup
Fabric puckering
Needle stress
Too little density can create gaps and allow the fabric to show through.
The right density depends on the stitch type, design size, thread, and fabric.
Underlay provides a foundation beneath the visible stitches.
It can help stabilize the fabric, support top stitches, and improve the overall appearance of the embroidery.
The correct underlay depends on the design and material being embroidered.
The order of embroidery objects matters.
A well-planned sequence can reduce unnecessary jumps and trims while helping different sections of the design line up properly.
For example, larger background elements are often stitched before smaller foreground details.
Once your design has been digitized and checked, export it in the format required by your Bernina machine.
Always confirm the exact file requirements for your model before transferring the design.
A file that opens successfully on the machine is not necessarily a well-digitized file.
A good embroidery file should be designed for actual stitching conditions.
Look for:
Clean stitch paths
Suitable density
Proper underlay
Smooth curves
Appropriate stitch lengths
Logical object sequencing
Correct design size
Manageable thread changes
Good small-text readability
The design should also be tested whenever possible.
Many people search for ways to turn JPG or PNG images into embroidery files.
The important thing to understand is that this is not simply a file-extension change.
For example:
JPG → EXP
does not automatically create a proper embroidery design.
Instead, the artwork must first be digitized. The digitizer decides how each part of the image should be represented with stitches.
A simple process looks like this:
Artwork → Digitizing → Stitch Editing → Testing → Bernina-Compatible File
This approach gives you much more control over the final embroidery.
Some embroidery programs offer automatic digitizing features.
These tools can be useful for simple artwork, especially when you want to experiment or create basic designs quickly.
However, automatic conversion may not handle every embroidery challenge correctly. Small text, overlapping objects, fabric movement, and complex shapes often need manual adjustments.
For professional logos and production embroidery, reviewing and editing the automatically generated stitches is important.
One design does not always work perfectly on every fabric.
For example, a design stitched on stable cotton may behave differently when placed on stretchy knitwear.
You may need to adjust:
Underlay
Stitch density
Pull compensation
Stitch direction
Design size
Stabilizer choice
Before creating a large batch of embroidered products, it is smart to stitch a sample.
If you want your designs to stitch cleanly, keep these practical tips in mind.
Tiny details can disappear when embroidered.
If your design contains very small lettering or narrow shapes, consider simplifying them rather than trying to reproduce every tiny detail.
Adding more stitches does not automatically create better embroidery.
Too many stitches can make the design heavy and cause fabric distortion.
Stabilizer helps support the fabric during stitching.
The best option depends on the material, design, garment type, and embroidery application.
Use your embroidery software's preview or simulation tools to inspect the sewing sequence.
Look for unnecessary jumps, awkward stitch directions, excessive trims, and other potential problems.
Whenever possible, test the design on the same or similar fabric that will be used for the final product.
This gives you a much better idea of how the embroidery will actually look.
Even when a design looks perfect on a computer, problems can appear during stitching.
Puckering can occur when the fabric moves or the embroidery contains excessive density.
Proper stabilization and digitizing adjustments can help.
Thread breaks may be related to excessive density, unsuitable stitch lengths, thread tension, needle choice, or other machine and material factors.
When different design elements do not line up properly, the problem may involve fabric movement, sequencing, compensation, or stabilization.
Small text can become difficult to read when embroidered. Increasing the size or simplifying the lettering can often produce better results.
Creating an embroidery file is more than converting artwork into a different format.
Professional digitizing involves making decisions about how the design will physically behave when stitched.
For business logos, uniforms, hats, patches, and other production work, a properly digitized file can help reduce failed samples and improve consistency.
At Absolute Digitizing, the focus is on preparing embroidery artwork with practical stitch planning in mind, so the finished file is ready for real embroidery rather than simply looking correct on screen.
Consider professional help when:
Your logo contains many details
You need very small lettering
The design will be used commercially
You need several embroidery sizes
You are working with difficult fabrics
You need a quick turnaround
You want consistent production results
For a simple monogram, learning to digitize yourself may be a useful project. For an important business logo, professional digitizing can save time and reduce trial and error.
Before transferring a design to your machine, check the following:
Is the file format compatible with your Bernina model?
Is the design the correct physical size?
Are the thread colors organized correctly?
Is the stitch density appropriate?
Does the design have suitable underlay?
Are small details large enough to embroider?
Is the stitch sequence logical?
Have you previewed the complete design?
Have you tested it on the intended fabric?
A few minutes of preparation can prevent a lot of wasted thread and fabric.
To create embroidery files for Bernina machines, you need more than a regular image and a file converter. Artwork must be carefully digitized into stitch instructions that the embroidery machine can follow.
The process includes preparing artwork, choosing the finished size, selecting stitch types, setting density and underlay, planning the sewing sequence, and exporting the correct machine-compatible format.
For the best results, always consider the fabric, embroidery size, design complexity, and final application. And whenever the design is important, test it before moving into full production.
With the right digitizing process, your Bernina machine can turn digital artwork into clean, professional-looking embroidery.
Bernina embroidery workflows commonly use the EXP format. However, requirements can vary by machine model, so you should check your specific machine's documentation before exporting a design.
Not properly through a simple file conversion. A JPG contains image pixels, while an embroidery file contains stitch instructions. The artwork generally needs to be digitized first.
Yes. With suitable embroidery digitizing software and some practice, you can create your own machine embroidery files. More complex designs usually require additional digitizing knowledge and manual editing.
Fabric movement, stitch density, thread tension, stabilizer, needle choice, and digitizing settings can all affect the final result. A computer preview cannot perfectly reproduce every physical stitching condition.
Use the correct file format, choose suitable stabilizer, avoid excessive stitch density, simplify tiny details, and test the design on the intended fabric before production.

Queue

 Loading ...